Set up Elastic IP with AWS
An Elastic IP lets you keep the same IP address through server restarts, which makes life easier when you're connecting to a remote server
By default, AWS instances are assigned an IP address when they are started up. If you stop an instance for any amount of time, that IP address might be released and reused on a different server (probably by some other AWS customer). If you want to keep an IP address constant for a long time, Elastic IPs are the way to go. An Elastic IP costs $0.005/hour, or approximately $3.60/month.
Objective
- Set up an Elastic IP address and associate it with a running EC2 instance
Prerequisites
- An AWS account
- An existing EC2 instance to attach the IP address to
Steps
- Open the AWS Management Console and navigate to the EC2 dashboard
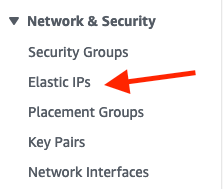
- In the menu on the left, under Network & Security, select Elastic IPs

- Click the big orange button to Allocate Elastic IP address
- Leave the default selected options on the page, then click Allocate at the bottom
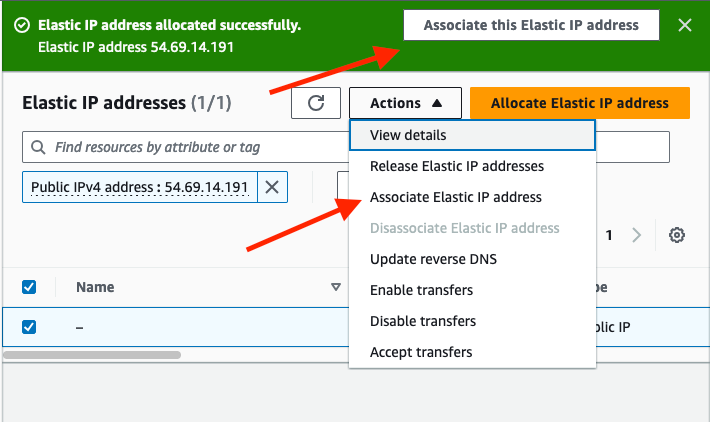
- This will bring up the Elastic IP list. You can now associate the IP address with an instance to assign it. You can either click the "Associate this Elastic IP address" button in the green banner at the top, or check the box next to the new Elastic IP, then click the Actions dropdown and select Associate Elastic IP address.

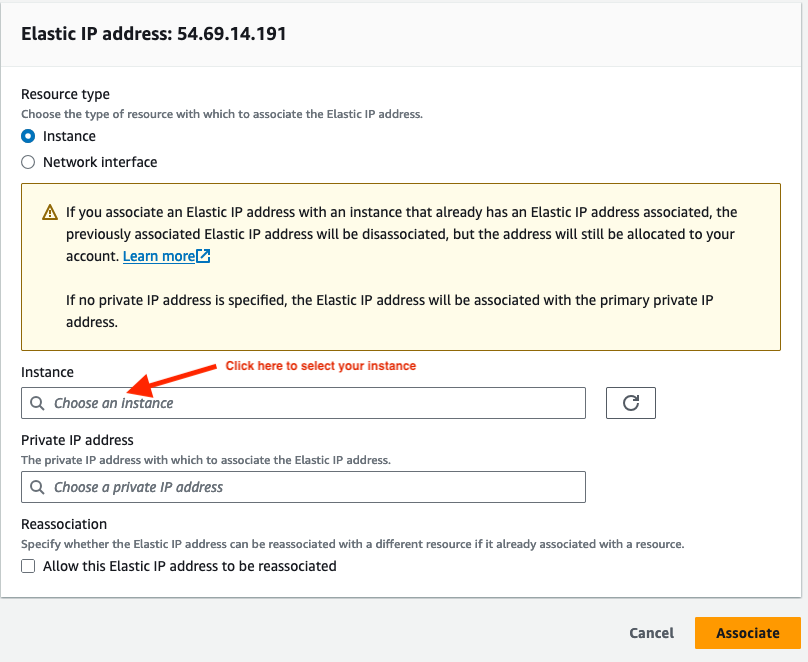
- On the Associate page, choose the Resource type of Instance, then select the instance you want in the box below. You do not need to choose a Private IP address.
- The Reassociation checkbox allows you to move an Elastic IP to a new instance without first disassociating it from the current instance. You can check that or leave it unchecked.

- Click "Associate" at the bottom of the page, and you'll now have assigned your Elastic IP to the instance
Now you can use that IP address for every interaction with the server. This makes it easier to set up DNS records, SSH configurations, or any other recurring interactions without worrying that the IP address is going to change.