Windows Files and File System
The file system is where all your work gets done, and all your dreams come true.
Welcome to the first post in the “Noob2Poweruser” series, where we will transform your basic computer knowledge into expert-level understanding. In this tutorial, we will cover the essentials of handling files on your Windows computer.
(For the Mac version of this same content, go here)
Goals
- Learn how to navigate File Explorer
- Navigate to the root of your C:\ drive and into your user directory
- Create a new folder and file
Introduction to Files
Files are the fundamental units of work on your computer. Whether you’re dealing with documents, images, or any other type of data, understanding how files are stored and accessed is crucial. If you’ve mostly used cloud storage solutions like Google Drive, this guide will help you get familiar with the local file system on your computer.
Opening File Explorer
To start exploring files on Windows, we need to open the File Explorer:
- Using the Taskbar: Click the folder icon located on the taskbar.
- Using the Start Menu: Click the Windows icon at the bottom-left corner, type “file” in the search bar, and select “File Explorer” from the list.

Navigating File Explorer
Once File Explorer is open, you will see a structured view of your files and folders.
Quick Access: This is at the top and provides shortcuts to frequently used folders. You can customize it by right-clicking any folder and selecting “Pin to Quick Access.”
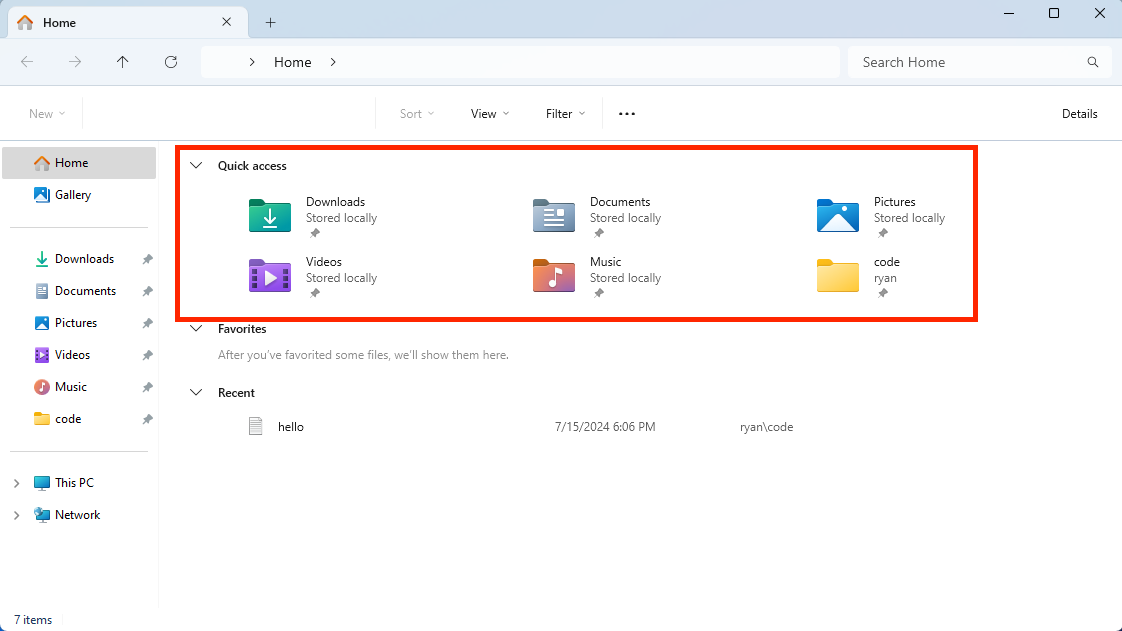
Customizing Quick Access
Quick access is just a list of shortcuts to different folders on your computer. Removing something from Quick Access doesn't remove it from your computer, it just removes that shortcut (like how deleting a bookmark to a webpage doesn't delete the webpage itself).
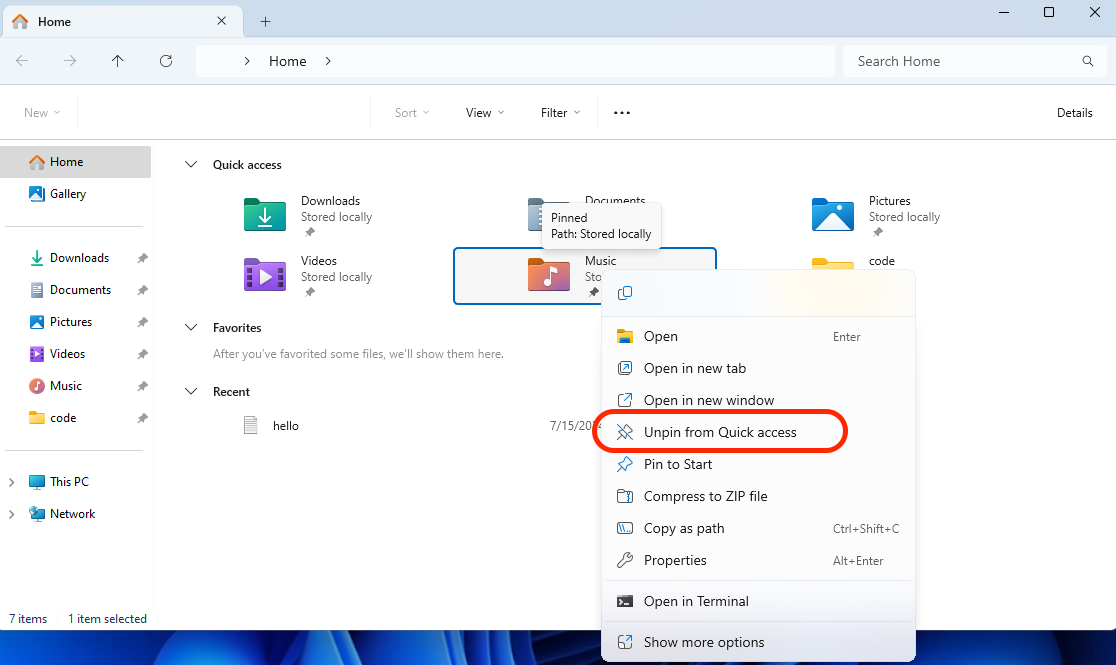
To remove a folder from Quick Access:
- Right-click the folder (e.g., Music).
- Select “Unpin from Quick Access.”
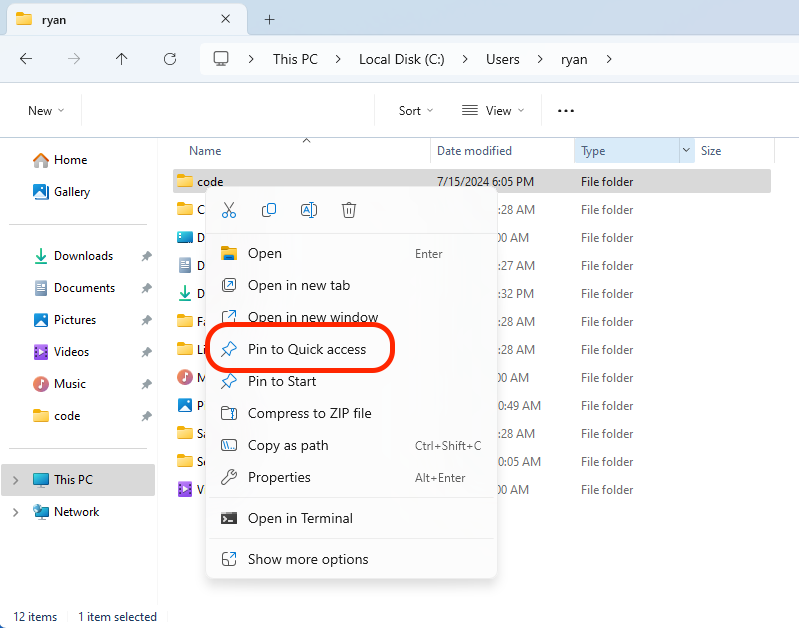
To add a folder to Quick Access:
- Find the folder on your file system. You can search for the folder using the search bar at the top.
- Right-click the folder and select “Pin to Quick Access.”
Understanding File Paths
Every file on your computer has a path that indicates its location. A typical path on Windows looks like this: C:\Users\YourName\Documents.
\). On Windows, that backslash is how the path is divided up. On macOS and Linux, a forward slash (/) is the path separator.• Drives: The main drive is usually labeled C:. This is commonly called the "C drive."
• Folders: Folders are used to organize files. For example, the path C:\Users\YourName\Documents\Music means the Music folder is located inside the Documents folder, which is inside the YourName folder, on the C: drive.
Exploring the C: Drive
To navigate to the root of your C: drive:
- Click on "This PC" in the sidebar
- Double-click on the C: drive (usually labeled
Local Disk (C:))

You will see several top-level folders. To find your user directory:
- Double-click on the “Users” folder.
- Find your user folder (e.g., “ryan”). Double-click that folder to open it.
Creating and Managing Folders
To create a new folder:
- Navigate to the location where you want the folder.
- Right-click in an empty space in the directory and select “New” > “Folder.”
- Name your folder (e.g., “code”).
- Add this new folder to Quick Access by right-clicking it and selecting “Pin to Quick Access.”
Working with Files
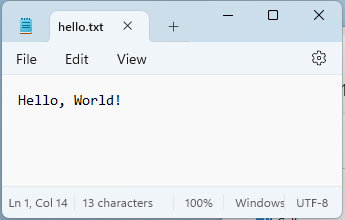
To create a new file:
- Inside your newly created folder, right-click, select “New” > “Text Document.”
- Name the file (e.g., “hello”).
- Double-click the file to open it and type your content (e.g., “Hello World”).
- Save and close the file.
Conclusion
You’ve now learned the basics of navigating the file system on your Windows computer. Understanding how to use File Explorer, customize Quick Access, and manage file paths will help you become a more effective computer user. Stay tuned for more tutorials in the Noob2Poweruser series.